Building an Efficient GPU Server with NVIDIA GeForce RTX 4090s/5090s
In today’s AI-driven world, the ability to train AI models locally and perform fast inference on GPUs at an optimal cost is more important than ever. [1] Building your own GPU server with an RTX 4090 or RTX 5090 — like the one described here — enables a high-performance eight-GPU setup running on PCIe 5.0 with full x16 lanes. [1] This configuration ensures maximum interconnect speed for all eight GPUs. [1] In contrast, most similar setups are limited by the PCIe bus version (such as PCIe 4.0 or even lower), due to the challenges of running longer PCIe extensions. [1]
This guide will walk you through our process of building a highly efficient GPU server using NVIDIA’s GeForce RTX 4090s. [1] We’ll be constructing two identical servers, each housing eight RTX 4090 GPUs and delivering an impressive amount of computational power in a relatively simple and cost-effective package. [1] All GPUs will run on their full 16 lanes with PCIe 4.0. [1] (Note: We have built and tested our servers exclusively with the GeForce RTX 4090. While we have not yet tested them with the RTX 5090, they should be compatible and are expected to run with PCIe 5.0.) [1]
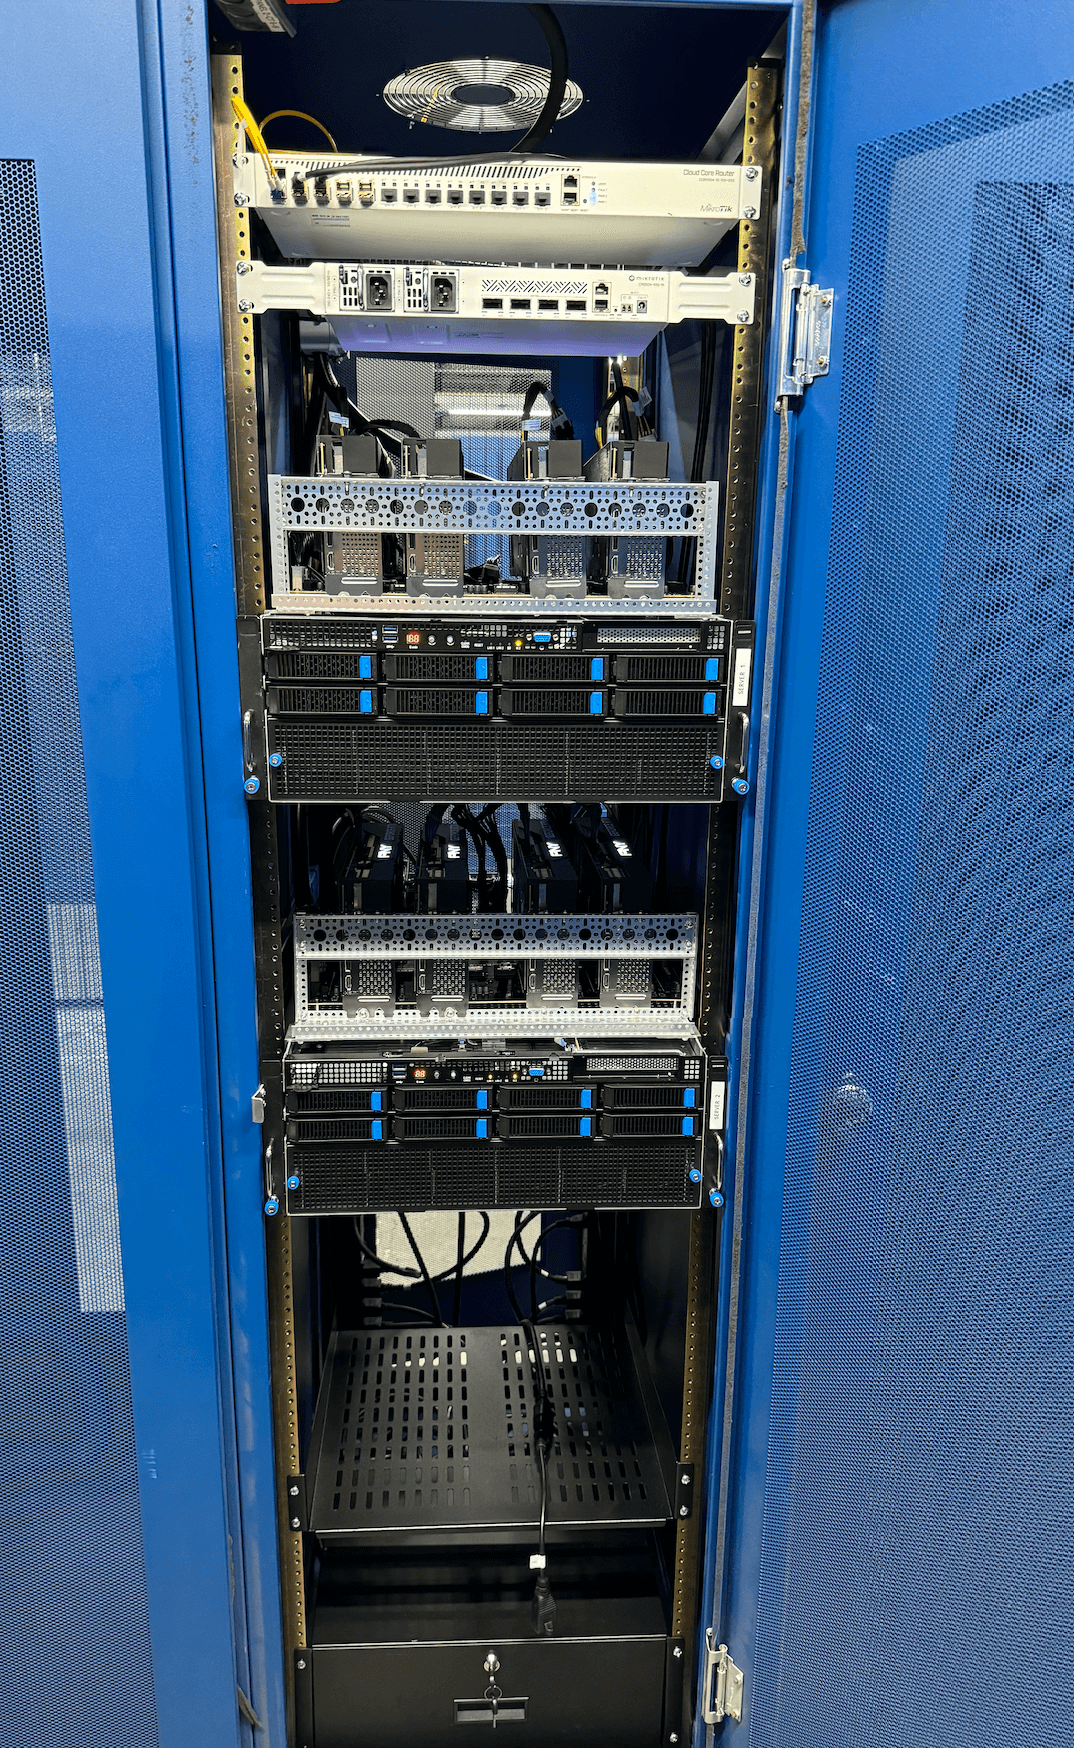
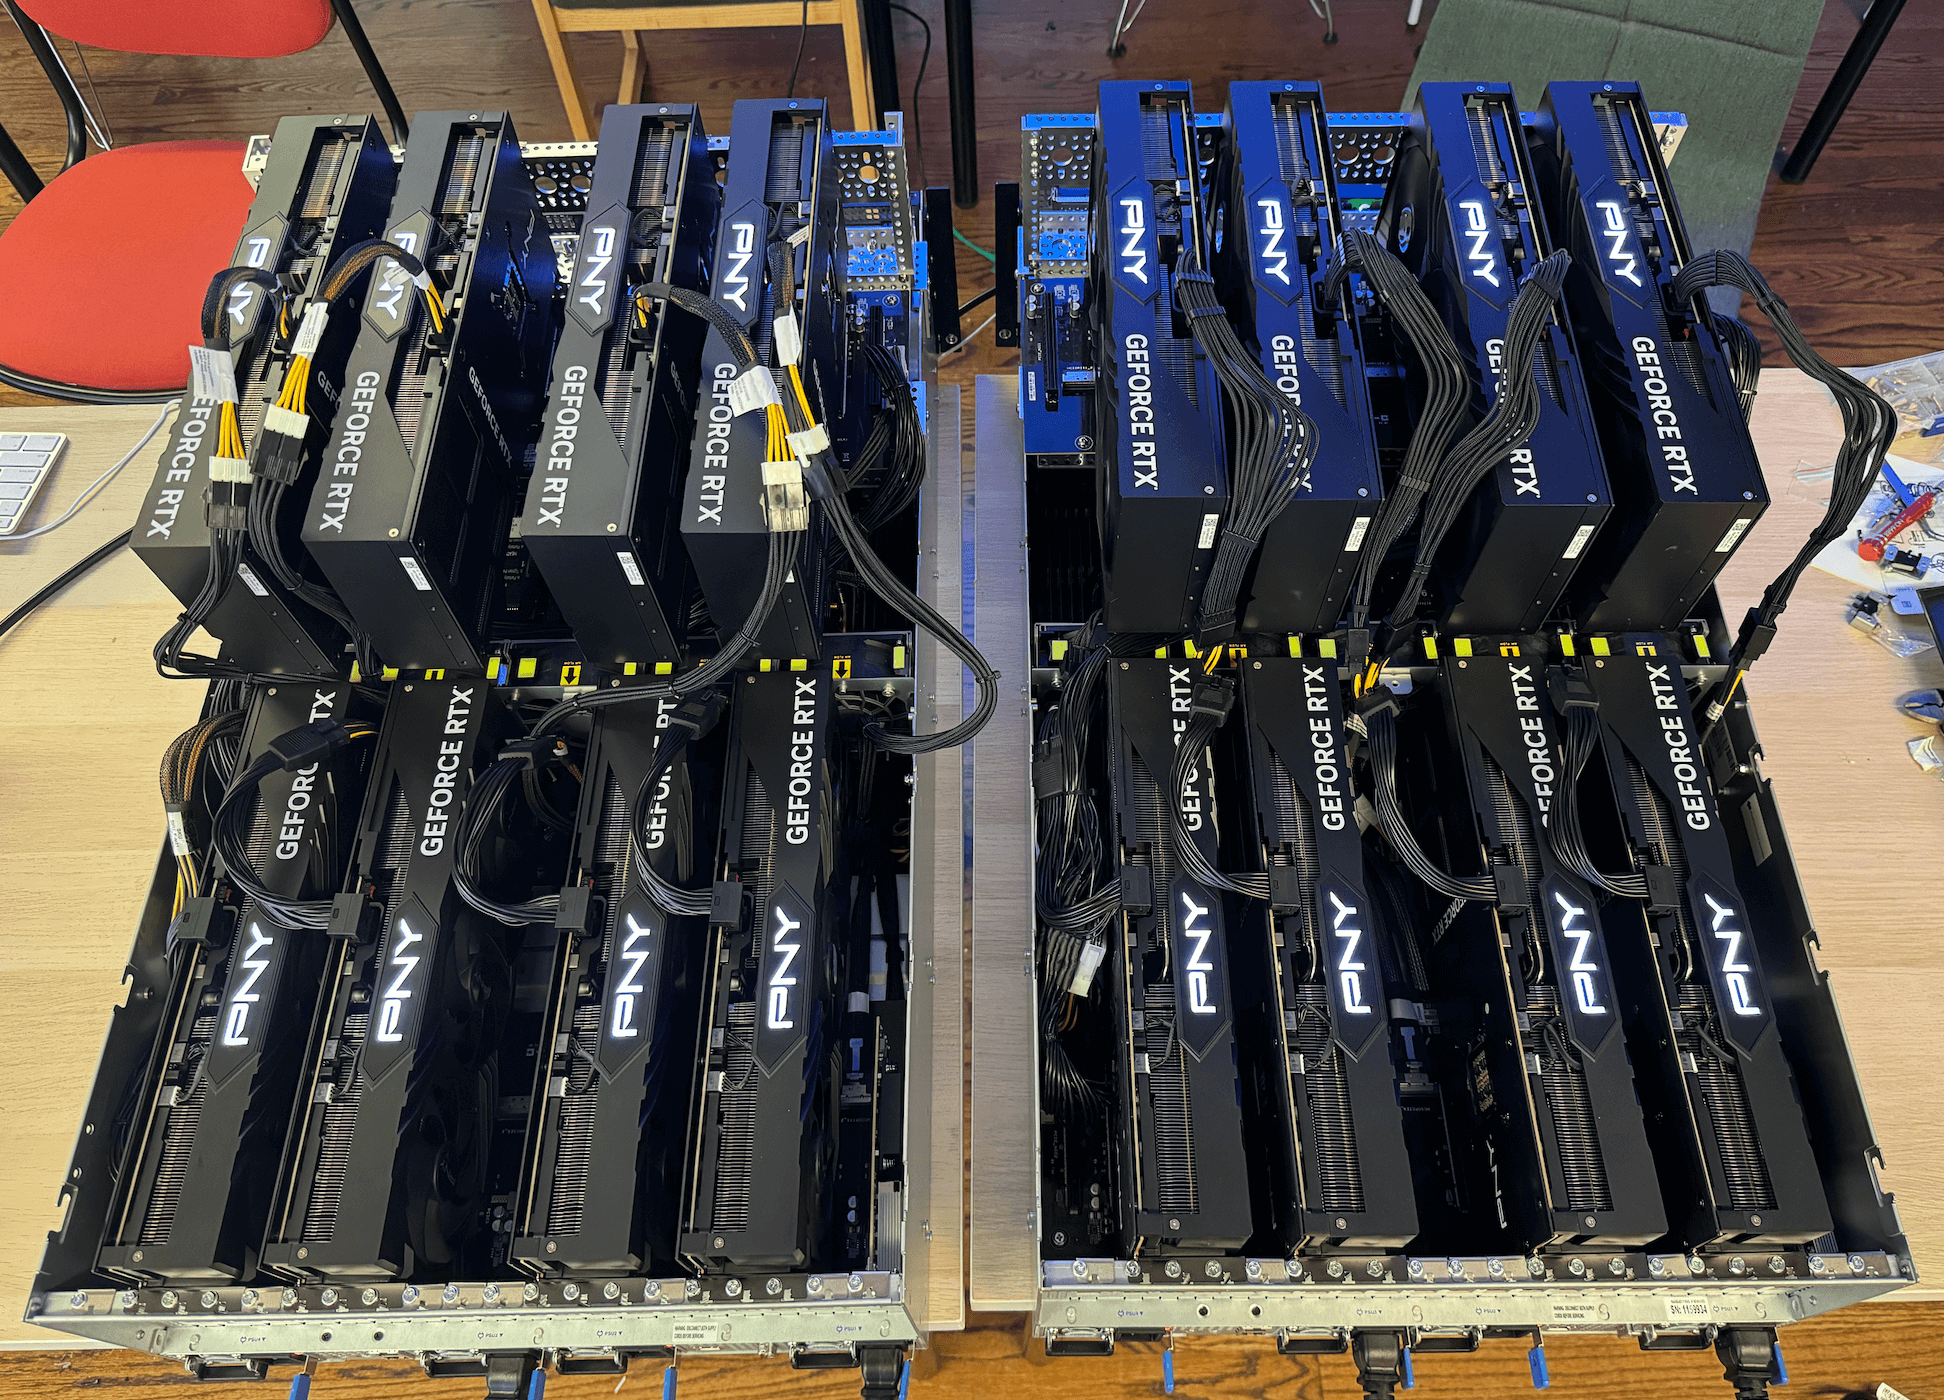
The two servers we built and tested.
Why build this server?
Building a small GPU server, particularly with powerhouse GPUs like the NVIDIA RTX 4090 or the new RTX 5090, provides exceptional flexibility, performance, and privacy for running large language models (LLMs) such as LLaMA, DeepSeek, and Mistral, as well as diffusion models, or even custom fine-tuned variants. [1] Modern open-source models are designed with efficient inference in mind, often using Mixture of Experts (MoE) architectures, and the 4090s can easily handle those workloads. [1]
The NVIDIA RTX series of GPUs presents a compelling option for this type of project, offering phenomenal performance at a competitive cost. The RTX 4090 and RTX 5090 are absolute beasts. [1] With 24GB of VRAM and 16,384 CUDA cores on the RTX 4090, and an expected 32GB of VRAM and 21,760 CUDA cores on the RTX 5090, both deliver exceptional FP16/BF16 and tensor performance — rivaling datacenter GPUs at a fraction of the cost. [1] While enterprise-grade options like the H100 or H200 offer top-tier performance, they come with a hefty price tag. [1]
Server specifications
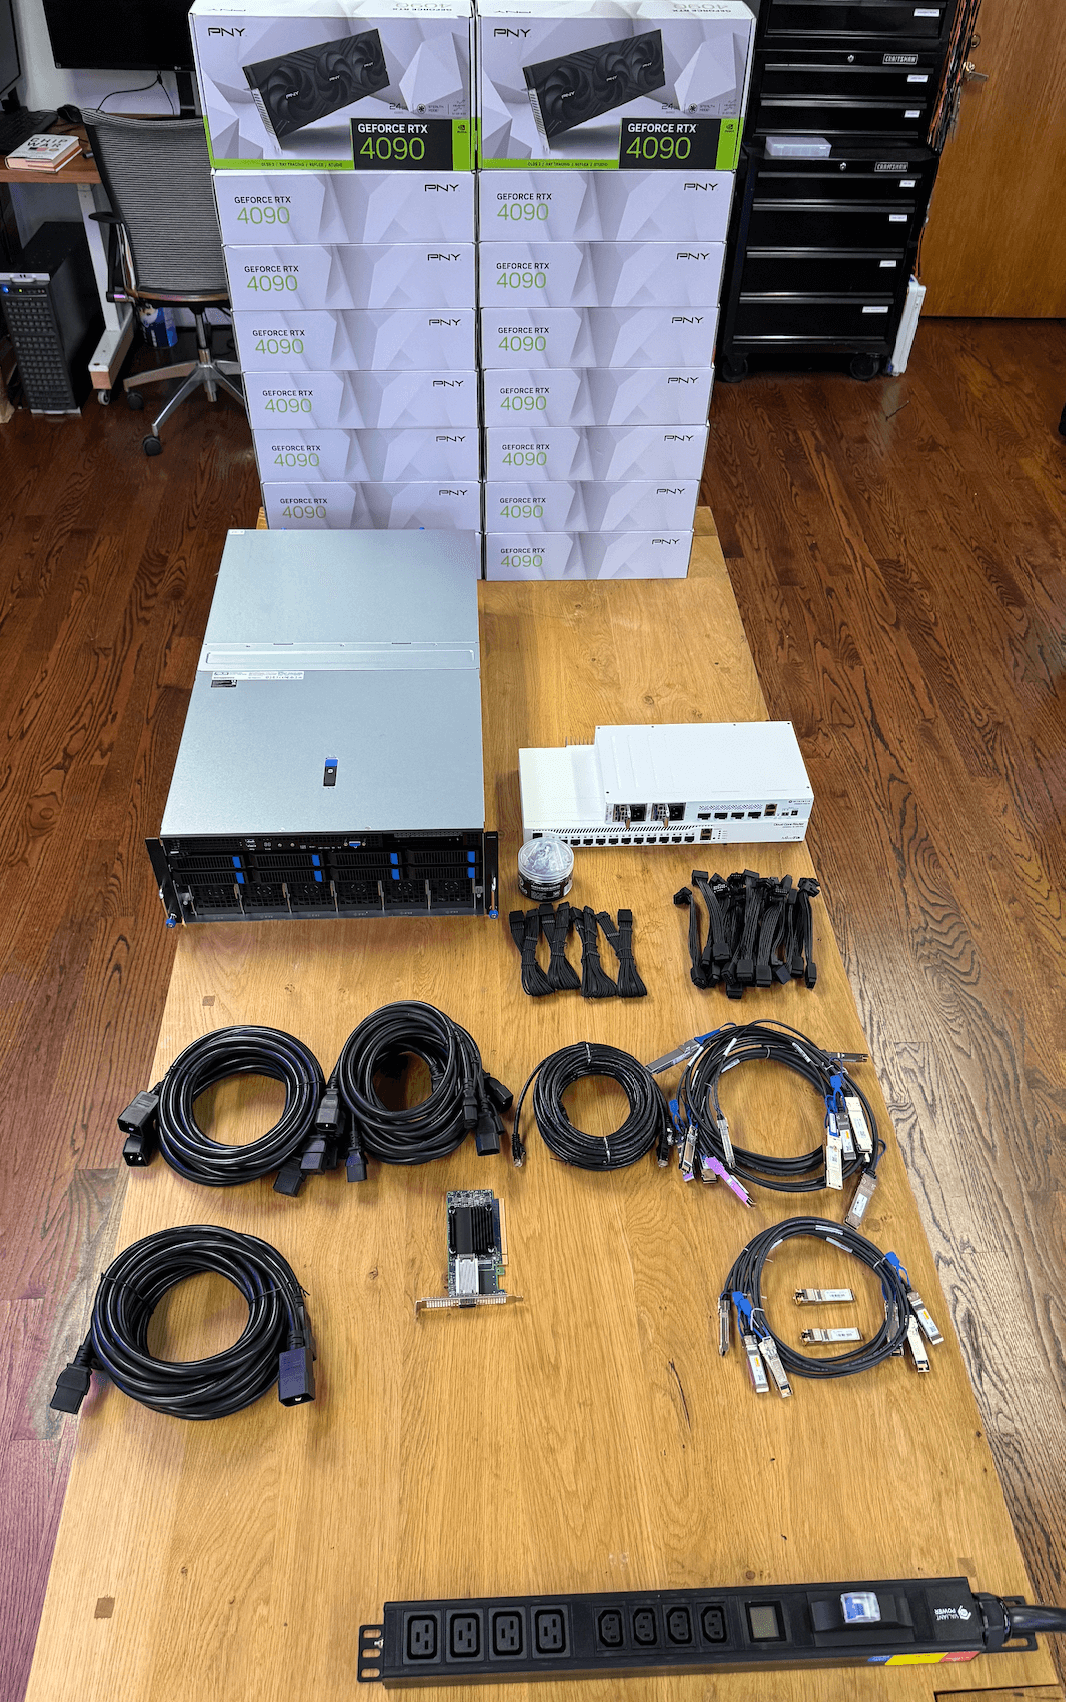
Before we begin the build process, let’s review the key components and specifications of our GPU server: [1]
- Server model: ASUS ESC8000A-E12P
- GPUs: 8x NVIDIA RTX 4090
- CPU: 2x AMD EPYC 9254 Processor (24-core, 2.90GHz, 128MB Cache)
- RAM: 24x 16GB PC5-38400 4800MHz DDR5 ECC RDIMM (384GB total)
- Storage: 1.92TB Micron 7450 PRO Series M.2 PCIe 4.0 x4 NVMe SSD (110mm)
- Operating system: Ubuntu Linux 22.04 LTS Server Edition (64-bit)
- Networking: 2 x 10GbE LAN ports (RJ45, X710-AT2), one utilized at 10Gb
- Additional PCIe 5.0 card: ASUS 90SC0M60-M0XBN0
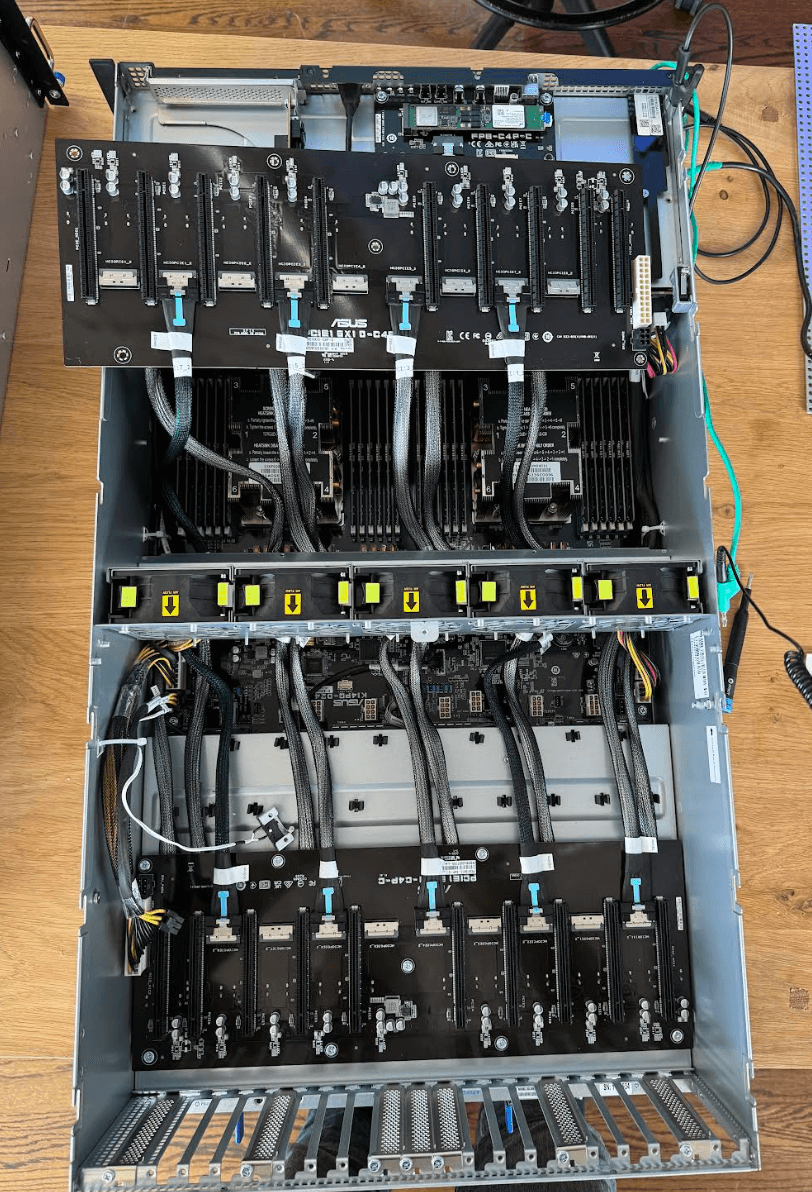
An inside look at our completed build.
The build process
Next, let’s walk through the steps of assembling this high-performance GPU server.
Step 1: Preparing the server chassis
Begin with the ASUS ESC8000A-E12P server chassis. Remove the top cover and any unnecessary internal components to make way for our custom configuration.
Step 2: Installing the RAM
Install the 24 16GB DDR5 ECC RDIMM modules into the appropriate slots on the motherboard. Ensure they are properly seated and locked in.
Step 3: Installing the storage
Locate the M.2 slot on the motherboard. Install the 1.92TB Micron 7450 PRO Series M.2 PCIe 4.0 NVMe SSD.
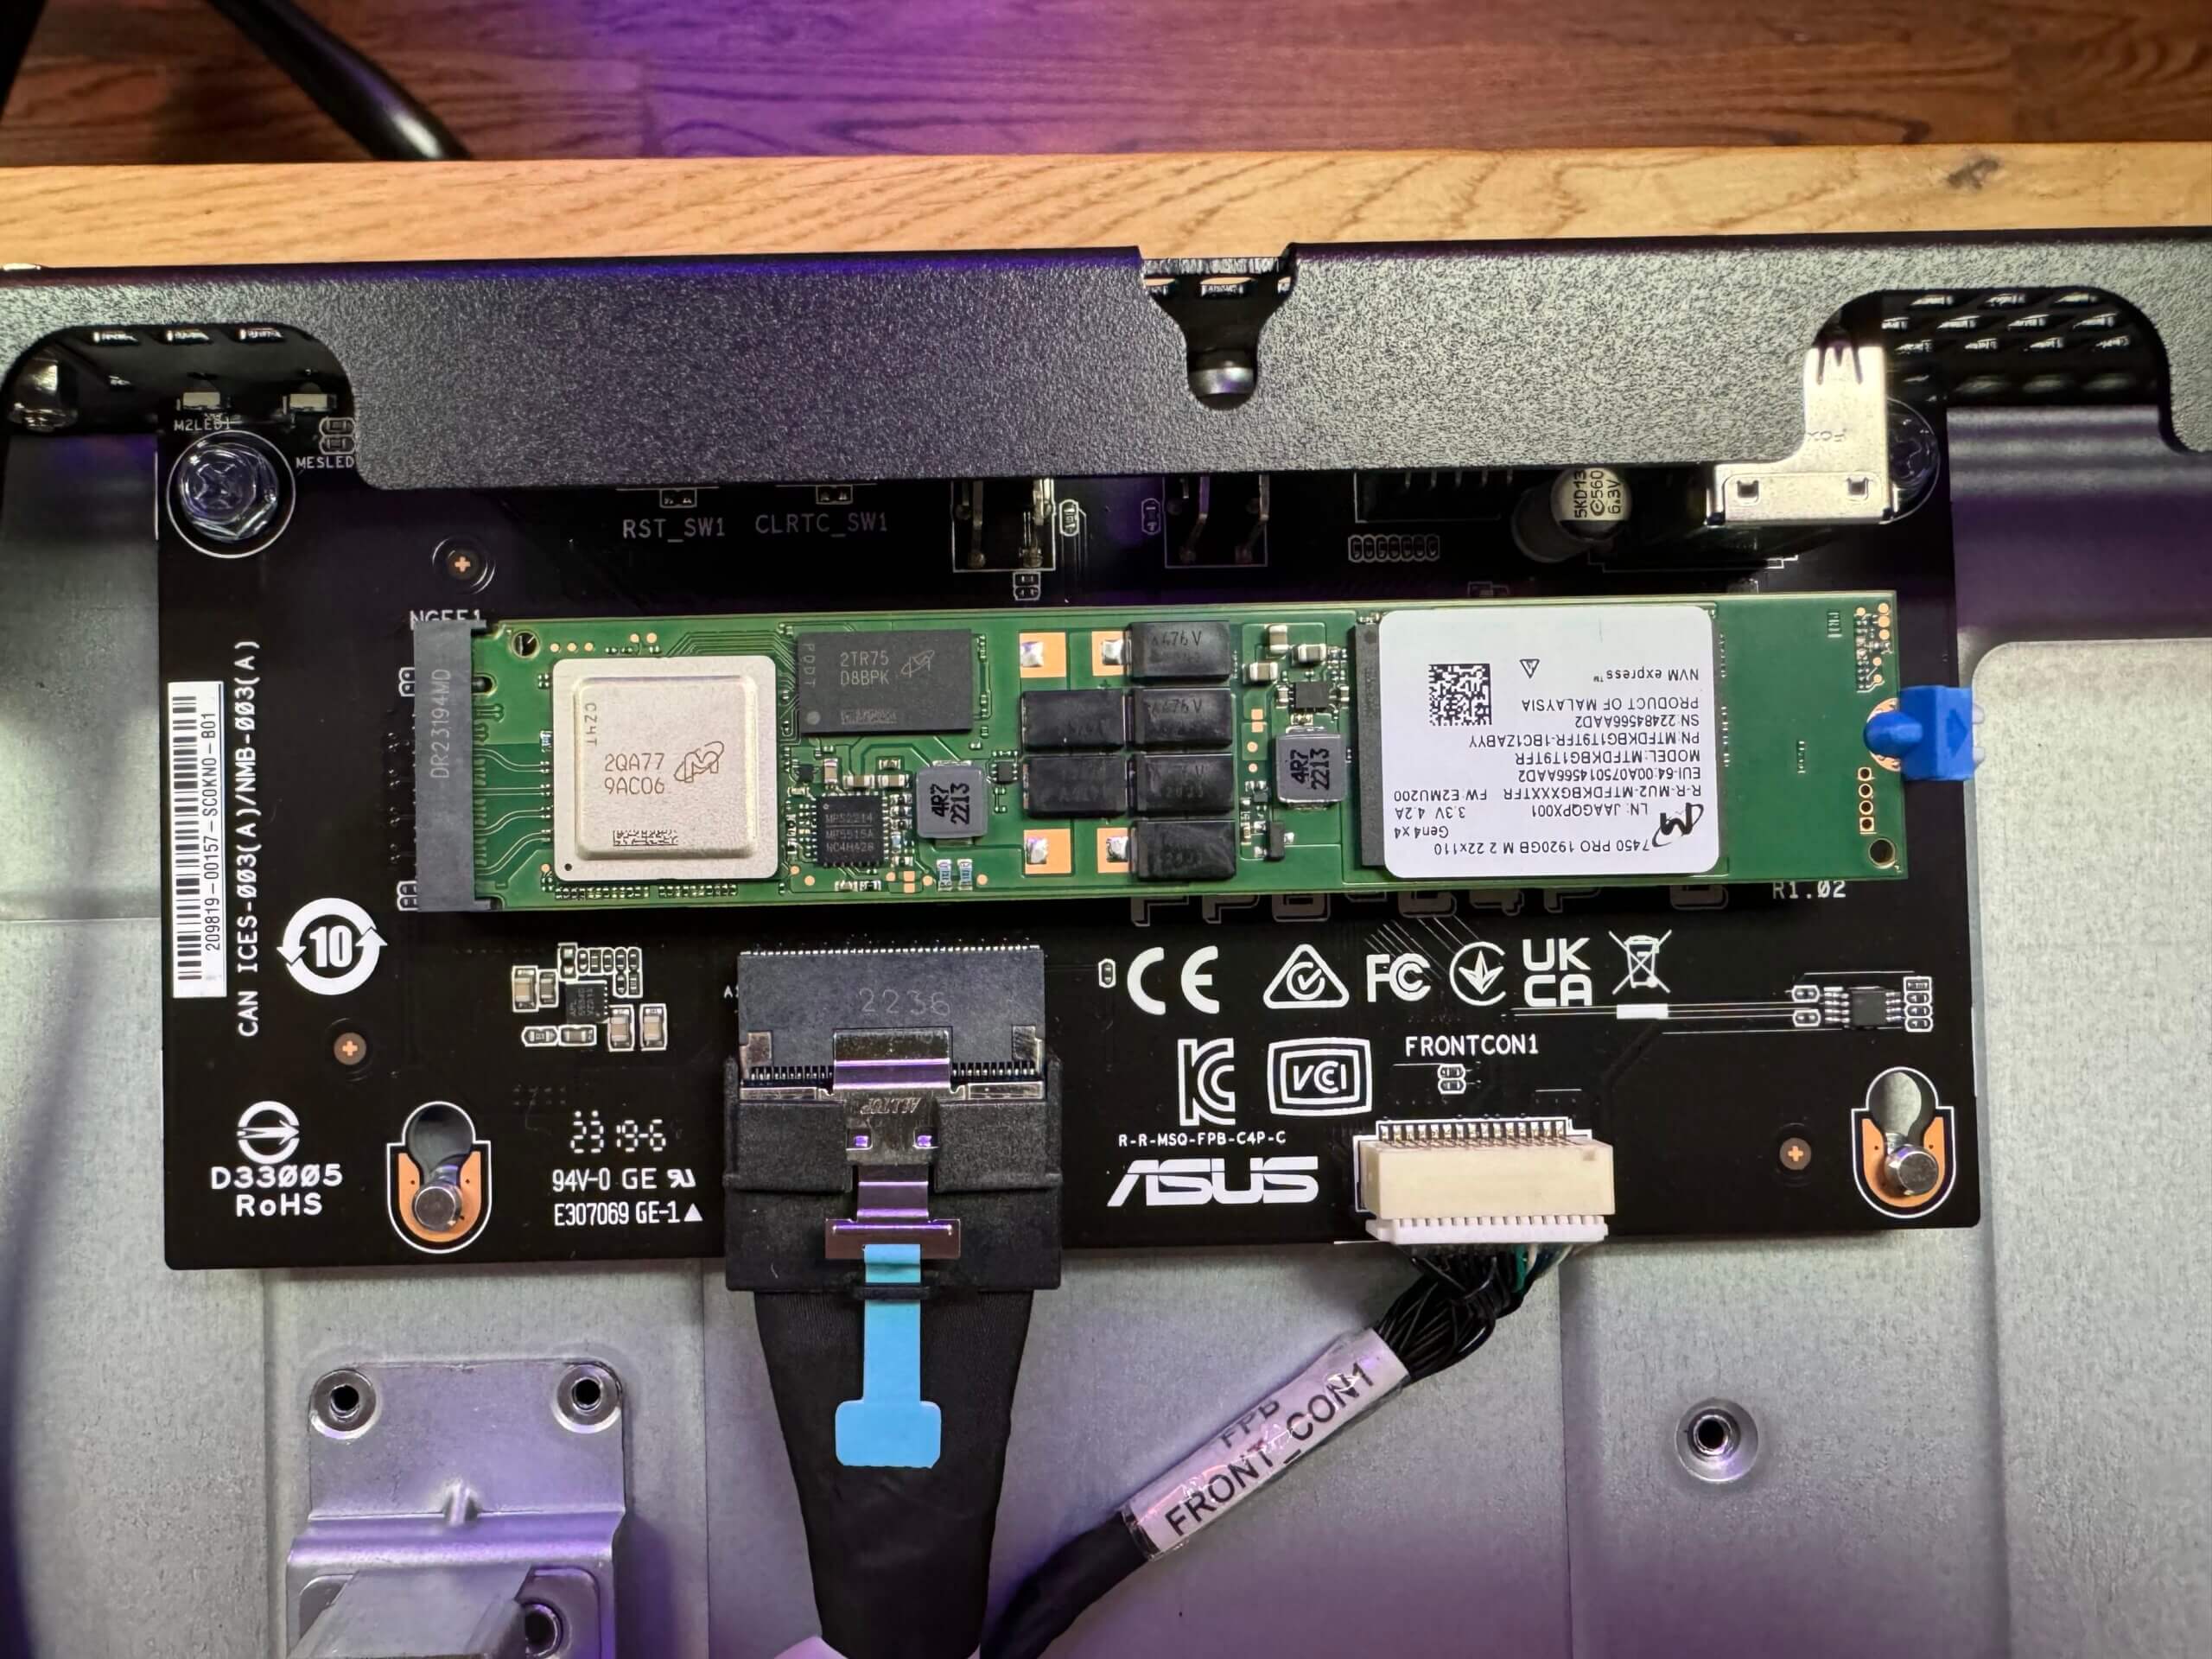
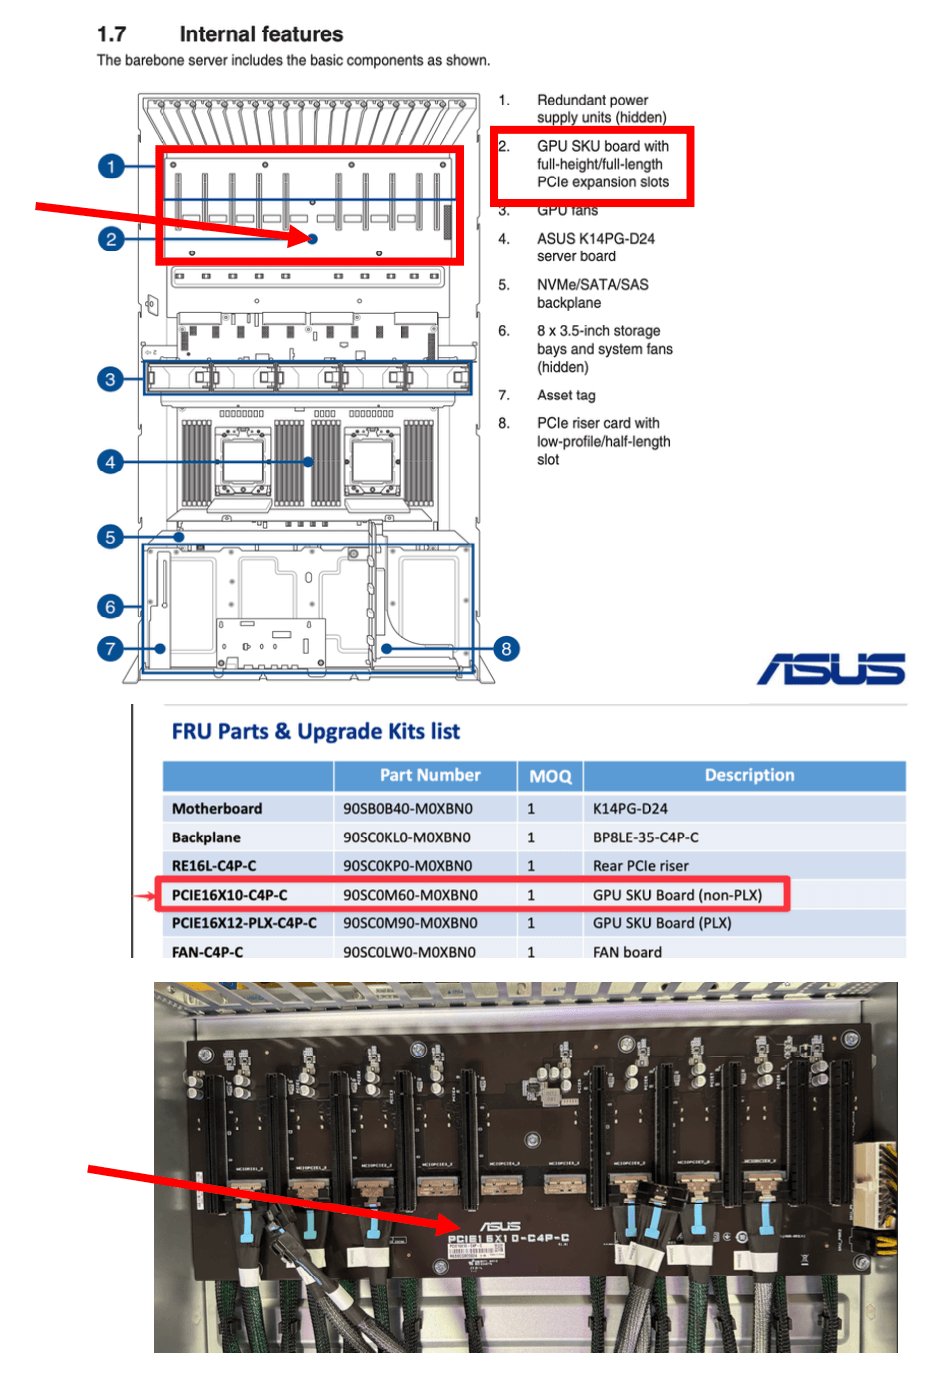
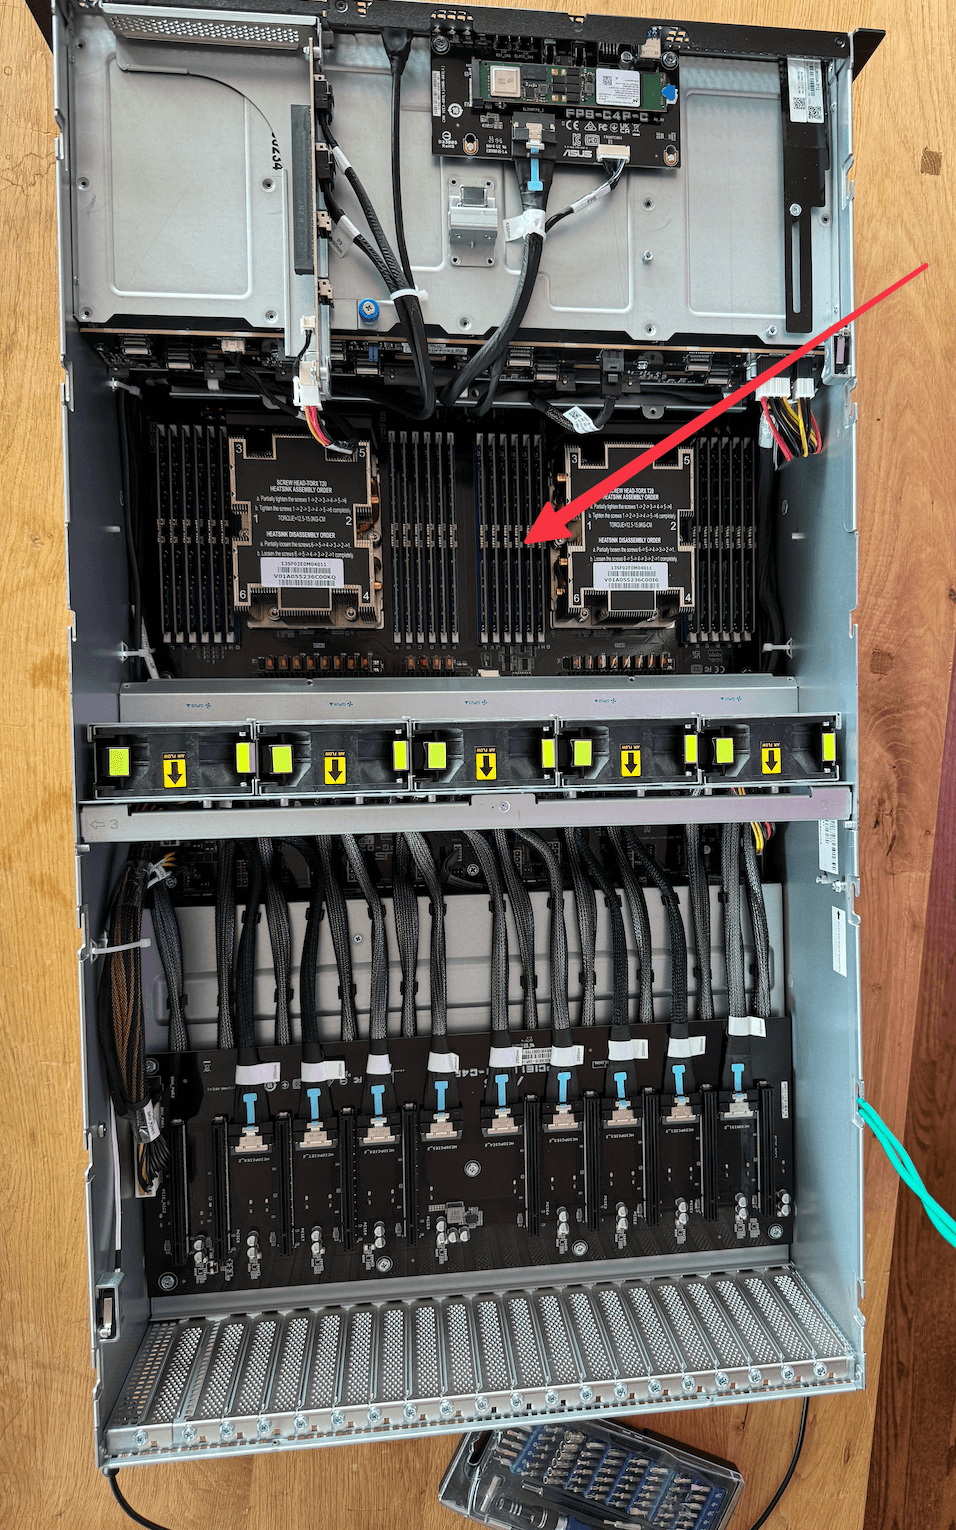
Step 4: Preparing the PCIe boards
Install the ASUS 90SC0M60-M0XBN0 PCIe 5.0 add-on card. Reroute four pairs of the cables (these are numbered on the cables) from the original PCIe card that is already installed in the server (the bottom PCIe card). We used an alternating sequence: The first set remains on the bottom PCIe card, the second is attached to the top card, the third remains on the bottom card, and so on.
Step 5: Creating a “Y” splitter cable for the ATX 24-pin and 6-pin connectors
Create a “Y” splitter cable extension to provide power to the external 90SC0M60-M0XBN0 PCIe 5.0 riser card that will sit on top of the server. Ensure that the “Y” splitter cable extension is of the proper gauge to safely handle the power requirements of both the external PCIe card and the GPUs.

Step 6: Installing the lower-level GPUs
Install four of the NVIDIA RTX 4090 GPUs into the lower PCIe slots on the original PCIe card (closer to the motherboard). Ensure they are properly seated and secured.
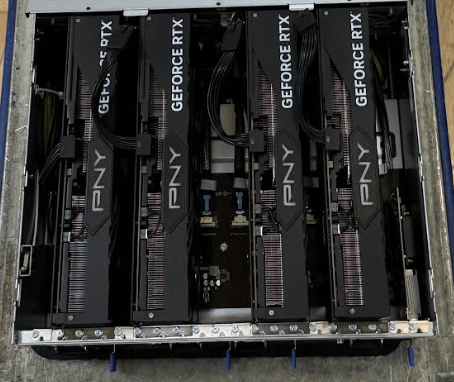
Step 7: Preparing and installing the custom frame for the upper-level GPUs
We built a custom frame using GoBilda components. Ensure that the frame is sturdy and appropriately sized to accommodate four RTX 4090 GPUs. Make sure that the power cables used are of the proper gauge to handle the requirements of each GPU.

Step 8: Network setup
Locate the two 10GbE LAN ports (RJ45, X710-AT2) on the server. Connect one of the ports to your 10G single-mode fiber network interface.
Step 9: Final assembly and cable management
Double-check all connections and component placements. Implement proper cable management to ensure optimal airflow and thermal performance, such as making sure there is enough space between the servers.
Step 10: Operating system installation
Create a bootable USB drive with Ubuntu Linux 22.04 LTS Server Edition (64-bit). Boot the server from the USB drive and follow the installation prompts. Once the installation is complete, update the system and install the necessary drivers for the GPUs and other components.
Final assembly
Once you’ve completed all the steps, you should have a GPU server that looks something like this and is ready to be put to work!